For those more into technology than art, this is the behind-the-scenes post about the production of the Catherwood Lecture (detailed in the previous post). It’s one of a number of practical how to posts I’ve been meaning to write for a while – partly to share experience and also selfishly to get feedback and discover how I can produce things more efficiently the next time!
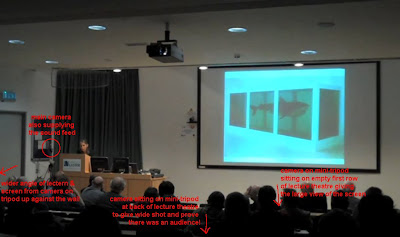
The lecture was captured on four fixed Flip cameras* (one of which has a badly cracked screen) and then edited together in Final Cut Express. Although a feed of the audio was also recorded straight out of the lecture theatre's PA system, on the finished video I found it easier just to use the audio captured by the camera closest to the lecturer!
There's a balance to be struck between capturing the raw footage and the time it'll take post-production. While you have to live with your mistakes, mixing live means you walk away after the event is over with a single piece of footage captured to hard drive or DVD that just needs topped, tailed and uploaded. However, the need to source bulkier cameras, power and cabling the venue tends to make that impractical. Much easier and certainly more unobtrusive to stick rechargeable Flip cameras on tripods (large or small) and flick each one’s big red button as the event starts.
If you click on the image below, it should expand to show where the cameras were placed. Three of them couldn’t be moved once the lecture started, so I was lucky that the angles worked so well so much of the time.

Older Flips can only store 1 hour of footage, so a couple of cameras actually ran out before the lecture ended! But the most important angles were from higher capacity cameras that would get right to the end.
As I said, rather than remixing the feeds after the event, it would have been twenty times faster to edit the footage live, with the four cameras feeding into a simple video mixing desk and a recorder.
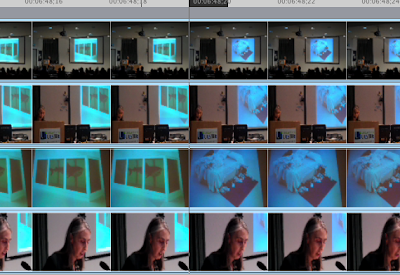
With small cameras, there’s no luxury of timecodes or clapper boards. In previous two camera shoots – usually shorter interviews – I’ve used the audio spike created by clicking my fingers before the interview started to synchronise the two pieces of footage in the video editor. This time, the cameras were too far apart for that trick to work. But since all the cameras could see some part of the projector screen, synchronising the four feeds was mainly achieved by lining up the frames where the big screen flicked from one image to another early on in the footage.

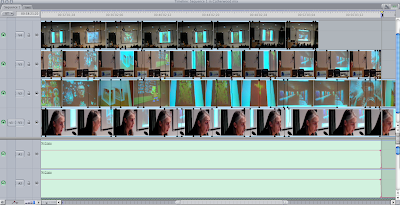
Editing a timeline with four one hour HD clips stacked on top of each other is not a pleasurable experience. Render times are astronomical … even the mandatory one to make the audio usable and get rid of the "beep beep beep" as you play the unrendered timeline. (While Final Cut Express can play audio from Flip clips from its bins, it can't play the audio unrendered when it's on the timeline. It's a mystery why this is the case.)
Editing linearly doesn’t seem to be a feature of non-linear editors. Shame really. There are still times when it’s necessary. Unfortunately there's no easy way – at least no easy way I've found – to simply cut between the four angles in Final Cut Express while retaining the integrity of the synchronisation with the sound. It would be lovely if there was a simple interface that replicated the normal live mixing environment and allowed the user to direct which camera should be taken as the source at any particular point in the time line.
Instead cuts were achieved through the tortuous process of manipulating the opacity effect of clips. Setting the opacity of a clip high up in the stack to zero means that the video from the clips underneath shine through.

An hour or so of footage is also a challenge to upload. Given that the talk was about works of art, the rendered and uploaded file needed to be as high resolution as possible.
I’ve a preference for hosting video on Vimeo. (The length ruled out Youtube which has a 15 minute limit for non-partners.) Vimeo limits uploads via the web interface to 1GB. However, the often-flaky Air-based uploader app copes with up to 2GB. Thankfully it didn’t fall over (as it normally does) during the eight hour upload.
The smallest HD file I could produce was 2.72GB – well over any limit. So I settled for a downscaled 960x540 clip – the format compatible with original Apple TVs! It came in at 1.58GB – which rendered in a few hours overnight with the assistance of a non-HD Elgato Turbo.264 hardware accelerator – and only looks a bit blurry now that Vimeo has transcoded it to its internal format.
Any tips on faster ways of editing the footage down gratefully received …
(*Although I was using Flip cameras, the process would be similar for other pocket-sized cameras.)
2 comments:
"inline" editing is pretty easy in Final Cut Pro, with multi-camera view. But the best tools are the tools we have, right?
Oh that's annoying. Finally started to find features missing from FCE. Drat.
Post a Comment